Installing a video doorbell is one of the easiest and most impactful smart home security upgrades you can tackle in an afternoon. Whether you choose a hardwired model that connects to your existing doorbell wiring or a battery-powered unit that mounts anywhere, most homeowners can complete the job in under 30 minutes with basic tools.
This guide walks you through every step, from preparation to final testing, so you get it right the first time.
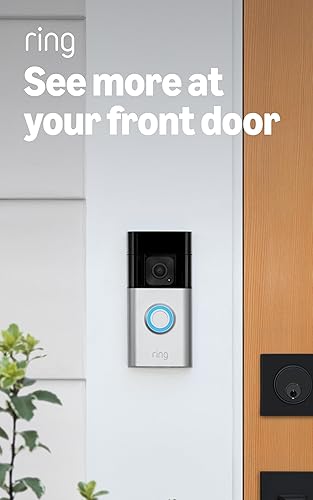
- 1080p HD video with HDR
- Pre-Roll Video previews
- Two-way talk with noise cancellation
- Customizable motion zones
Before You Start: Wired vs. Battery
Your installation approach depends on which type of video doorbell you have.
Battery-powered doorbells are the simplest. No wiring is required. You charge the built-in battery via USB, mount the bracket with two screws, snap the doorbell onto the bracket, and connect to WiFi. The entire process takes 10-15 minutes.
Wired doorbells connect to your existing doorbell transformer and chime. Installation is slightly more involved but means you never have to worry about charging batteries. Expect 20-30 minutes for a straightforward replacement.
If you are replacing an existing wired doorbell, a wired video doorbell is almost always the better choice. The constant power supply enables features like continuous recording and faster motion detection.
Tools and Materials You Need
Gather these before you begin:
- Phillips-head screwdriver (most mounting brackets use Phillips screws)
- Flathead screwdriver (for loosening wire terminals)
- Power drill with 5/32” masonry bit (if mounting on brick or stucco)
- Level (many doorbells include one, but a small torpedo level helps)
- Wire stripper or utility knife (for wired installs)
- Voltage tester (for wired installs — confirms power is off)
- Wall anchors (included with most doorbells, but good to have extras for brick)
Everything else — the mounting bracket, screws, wire connectors, and wedge/corner mount — should come in the box.
Step 1: Remove Your Old Doorbell
For wired installations:
- Turn off power at the circuit breaker. Your doorbell transformer is typically on the same circuit as your HVAC system or a dedicated low-voltage circuit. Flip the breaker and verify the power is off by pressing your existing doorbell button — no chime should sound.
- Remove the old doorbell by unscrewing it from the wall.
- Disconnect the wires from the terminal screws on the back. You will see two low-voltage wires (typically 18-gauge, solid copper). Do not let them fall back into the wall — wrap them around a pencil or tape them to the exterior temporarily.
For battery installations: If you have an existing wired doorbell, you can either remove it and patch the holes or simply mount the new doorbell over the same location. You do not need to connect the wires, but tuck them safely into the wall and cap them with wire nuts.
Step 2: Check Your Wiring and Transformer
This step applies to wired installations only and is the most common source of problems.
Video doorbells require a transformer that outputs 16-24 volts AC. Many older homes have 10V or 12V transformers that were fine for a simple mechanical chime but cannot power a video doorbell.
How to check your transformer:
- Locate the transformer. Common locations include the utility closet, near the electrical panel, in the attic, or mounted on the furnace junction box.
- Read the label on the transformer. It should state the output voltage.
- If it reads below 16V, you need a new transformer. A 24V, 40VA transformer (around $15-25 at any hardware store) is the safest upgrade and will support any video doorbell on the market.
If you cannot find the transformer, the two doorbell wires at your door should read 16-24V AC when tested with a multimeter. If the reading is below 16V, replacement is necessary.
Step 3: Mount the Bracket
- Hold the mounting bracket at your desired position. The ideal height is 48 inches (4 feet) from the ground to the center of the camera lens. This captures both faces and packages at the doorstep.
- Use the included level to make sure the bracket is straight.
- Mark the screw holes with a pencil.
- For wood or vinyl siding: Drill pilot holes and drive the screws directly.
- For brick or stucco: Use the masonry drill bit to create holes, insert the wall anchors, then drive the screws into the anchors.
- For wired installs: Thread the doorbell wires through the center hole of the bracket before securing it.
Step 4: Connect the Wires (Wired Only)
- Strip about 1/2 inch of insulation from each wire end if the copper is not already exposed.
- Wrap one wire around each terminal screw on the back of the doorbell. Polarity does not matter — doorbell wiring is AC, so either wire can go to either terminal.
- Tighten the screws firmly. A loose connection is the number-one cause of intermittent power issues.
- If your doorbell came with a diode or resistor for your chime type (mechanical vs. digital), install it on the chime unit inside your home according to the included instructions.
Step 5: Attach the Doorbell to the Bracket
Slide or snap the doorbell unit onto the mounting bracket. Most models click into place with a satisfying snap. Some use a small security screw on the bottom to prevent theft — tighten this with the included security tool (usually a star or Torx bit).
For wired installs, restore power at the breaker now. The doorbell should light up or play an activation tone within 15-30 seconds.
Step 6: Connect to WiFi and Set Up the App
- Download the manufacturer’s app (Ring, Google Home, Arlo, Eufy Security, etc.) and create an account if you do not already have one.
- Tap “Add Device” or “Set Up New Device” and select your doorbell model.
- The app will prompt you to scan a QR code on the doorbell or its packaging.
- The doorbell will enter setup mode (usually indicated by a spinning light or flashing LED). Follow the app prompts to connect it to your home WiFi network.
- Use your 2.4GHz network if you have separate 2.4GHz and 5GHz networks. Video doorbells almost universally perform better on 2.4GHz because it has greater range and better wall penetration. Some newer models support 5GHz, but 2.4GHz remains more reliable for outdoor devices.
Step 7: Adjust the Angle and Motion Zones
Once your doorbell is connected and streaming video:
- Open the live view in the app and check the camera angle. You want to see your doorstep, the walkway approaching your door, and ideally the street or driveway in the background.
- If the angle is off, most doorbells include a wedge mount (angled 15 degrees) or corner mount (angled 30-45 degrees) that you can install between the bracket and the wall to redirect the camera’s field of view.
- Configure motion zones in the app. Draw zones that cover your walkway and porch while excluding the street, sidewalk, or your neighbor’s yard. This dramatically reduces false alerts.
- Set motion sensitivity to medium as a starting point. You can fine-tune it over the next few days based on the alerts you receive.
Step 8: Test Everything
Run through this checklist:
- Live view: Open the app and verify you get a clear picture within 5 seconds.
- Motion detection: Walk through the detection zone and confirm you receive an alert.
- Two-way audio: Have someone press the doorbell button while you answer from your phone. Verify you can hear each other clearly.
- Night vision: Wait until dark and check the live view. Infrared mode should activate automatically.
- Chime (wired only): Press the doorbell button and confirm your indoor chime sounds.
- Smart assistant: If you use Alexa or Google, say “Show me the front door” to verify the integration works.
Common Installation Mistakes
Mounting too high. A doorbell at adult eye level (5-5.5 feet) points the camera above most visitors’ heads and misses packages entirely. Mount at 48 inches for the best overall coverage.
Ignoring the transformer. A weak transformer causes constant disconnections, failed firmware updates, and a doorbell that reboots every time the chime fires. Check your voltage before you start.
Skipping the wedge mount. If your door is recessed or at an angle to the walkway, the stock mounting position points the camera at a wall or railing. The wedge mount costs nothing (it is in the box) and fixes this instantly.
Loose wire connections. Give each wire a gentle tug after tightening the terminal screw. If it slides out, wrap it tighter and retighten. A poor connection will cause your doorbell to drop offline randomly.
Weak WiFi at the door. Your front door is often the farthest point from your router. If signal strength is below -65 dBm (check in the doorbell app under device health), add a WiFi extender or mesh node near the front of your home.
Troubleshooting WiFi Issues
WiFi problems are the most common complaint with video doorbells. Here is how to diagnose and fix them:
Symptom: Doorbell won’t connect during setup.
- Make sure you are connecting to a 2.4GHz network, not 5GHz.
- Move your router temporarily closer to the door for initial setup, then move it back.
- Check that your WiFi password does not contain special characters that some doorbells mishandle (ampersands, semicolons).
Symptom: Live view is slow to load or buffers constantly.
- Check signal strength in the app. Below -70 dBm is too weak for reliable video streaming.
- Add a mesh WiFi node or dedicated extender within 15-20 feet of the doorbell, ideally on the same side of the house.
- Reduce video quality to 720p temporarily to confirm the issue is bandwidth-related.
Symptom: Motion alerts are delayed by 10+ seconds.
- This is usually a cloud processing delay, not a WiFi issue. Enable local processing if your doorbell supports it.
- Check your router’s upload speed — video doorbells need at least 2 Mbps of consistent upload bandwidth per camera.
Symptom: Doorbell drops offline overnight.
- Battery models enter a low-power sleep mode and may take a few seconds to reconnect. This is normal.
- Wired models should never drop offline. Check your transformer voltage and wire connections.
Final Tips
A video doorbell is only as good as your WiFi connection and your motion zone configuration. Spend an extra 10 minutes dialing in your settings during the first week, and you will have a reliable, low-maintenance security device that lasts for years.
If you are still deciding which doorbell to buy, check out our Best Video Doorbells 2026 roundup for our top tested picks.
