Setting up a smart home security system used to require a professional installer, a long-term contract, and a hefty monthly bill. In 2026, you can build a comprehensive DIY security system in a single afternoon with nothing more than a WiFi connection and a smartphone. This guide walks you through every step, from planning your coverage to testing your final setup.
- 16 GB local storage on HomeBase 3 with expandable storage
- BionicMind AI for facial recognition and smart detection
- No monthly subscription fees for core features
- Encrypted local and cloud backup options
Step 1: Assess Your Home and Plan Your Coverage
Before you buy a single piece of equipment, walk through your home with a critical eye. Grab a pen and paper, or use the notes app on your phone, and document the following:
Entry points to secure:
- Front door (the number one point of entry for intruders)
- Back door and side doors
- Sliding glass doors or patio doors
- Ground-floor windows, especially those hidden from street view
- Garage door (both the vehicle door and any interior access door)
Coverage zones to monitor:
- Front porch and walkway (for package theft and visitor detection)
- Driveway (vehicle and motion monitoring)
- Backyard (especially if fenced with gate access)
- Main hallway or staircase (interior motion detection as a second line of defense)
Environmental factors:
- Do you have pets that might trigger motion sensors?
- Are there areas with extreme temperatures or direct weather exposure?
- How far are your outermost cameras from your WiFi router?
Sketch a simple floor plan and mark where sensors and cameras should go. This plan will prevent you from buying too little equipment or placing devices in redundant locations.
Step 2: Choose Your Equipment
A solid starter security system typically includes these components:
The Hub (Brain of the System)
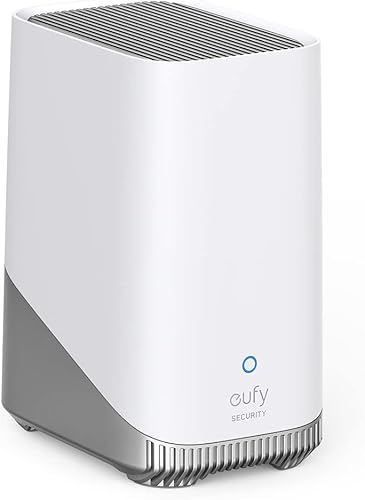
The hub connects all your sensors and cameras, processes alerts, and communicates with your phone. Systems like the Eufy Security S380 HomeBase act as a central hub with built-in local storage, meaning your video footage stays on a drive in your home rather than a cloud server. This eliminates monthly subscription fees and keeps your data private.
Door and Window Sensors
These small magnetic sensors detect when a door or window is opened. They consist of two pieces — one on the frame and one on the door or window itself. When the two pieces separate, the sensor triggers an alert. Plan on one sensor per entry point. Most systems include 2-4 sensors in the starter kit, and you can purchase additional sensors individually.
Motion Sensors
Place these in high-traffic interior areas like hallways and staircases. Modern motion sensors use passive infrared (PIR) technology and can be adjusted for pet immunity — typically ignoring movement from animals under 40-60 pounds. Position them at a height of about 6-7 feet and angle them toward the area you want to cover.
Cameras (Indoor and Outdoor)
For most homes, we recommend starting with:
- 1 doorbell camera for the front entrance
- 1-2 outdoor cameras covering the driveway and backyard
- 1 indoor camera for a main living area or hallway
Look for cameras with at least 1080p resolution, night vision, two-way audio, and smart detection (person, vehicle, package) — our security camera buying guide covers every spec to compare. The Eufy Security S380 system supports cameras that record locally to the HomeBase, so you avoid cloud subscription costs entirely.
Siren and Keypad
A visible keypad by your main entry point lets you arm and disarm the system with a PIN code. The built-in siren in the hub or an add-on siren provides an audible deterrent — 100 dB or louder is standard and effective enough to alert neighbors and scare off most intruders.
Step 3: Install Your Sensors and Cameras
With your plan in hand and your equipment unboxed, it is time to install.
Door and Window Sensors
- Clean the mounting surface with the included alcohol wipe
- Peel the adhesive backing and press the larger piece onto the door frame
- Attach the smaller magnet piece to the door or window, aligned within 1/2 inch of the sensor
- Open and close the door to test the gap — the sensor should trigger each time
No drilling required. Adhesive mounting holds firmly on wood, metal, and vinyl frames. If you are renting, these peel off cleanly when you move.
Motion Sensors
- Identify a corner or wall at 6-7 feet height that overlooks the area
- Mount using the included bracket and adhesive or a single screw
- Angle the sensor downward slightly toward the floor
- If you have pets, enable pet immunity in the app and test by walking your pet through the zone
Outdoor Cameras
- Choose a mounting height of 8-10 feet for optimal coverage and tamper resistance
- Use the included mounting template to mark drill holes
- Drill pilot holes, insert wall anchors (for brick or stucco), and screw in the mount
- Attach the camera to the mount and adjust the angle
- If battery-powered, ensure the camera is fully charged before mounting
Tip: Run a WiFi speed test at each camera mounting location before drilling. If the signal is below 5 Mbps, consider a WiFi extender or mesh system to ensure reliable streaming.
Indoor Cameras
Indoor cameras are typically freestanding and sit on a shelf, table, or mantel. Position them to cover entry points or high-value areas. Plug in the power cable and route it along the baseboard to keep things tidy.
Step 4: Connect Everything to WiFi and the Hub
- Download the app — for Eufy, that is the Eufy Security app on iOS or Android
- Power on the hub and connect it to your router with the included Ethernet cable. A wired connection for the hub ensures maximum reliability.
- Add devices one by one. Open the app, tap “Add Device,” and follow the on-screen pairing instructions. Most sensors pair via QR code scan or by pressing a small button on the device.
- Assign each device to a room. Name them clearly — “Front Door Sensor,” “Backyard Camera,” “Hallway Motion” — so alerts are immediately understandable.
- Update firmware. After pairing, check for firmware updates for the hub and each device. Manufacturers frequently push updates that improve performance and patch security vulnerabilities.
Step 5: Set Up Zones, Modes, and Automations
This is where your system goes from a collection of devices to an integrated security system.
Security Modes
Configure at least three modes:
- Home mode: Perimeter sensors active (doors and windows), interior motion sensors off, cameras recording. Use this when you are inside the house.
- Away mode: All sensors and cameras active, siren armed. Use this when everyone leaves.
- Disarmed: Everything off except cameras in monitor-only mode. Use when you are actively moving around the house with doors open.
Motion Detection Zones
For each camera, draw activity zones in the app to focus detection on specific areas. Exclude the sidewalk if your camera faces the street to avoid constant alerts from pedestrians. Focus on your walkway, porch, and driveway.
Automations
Set rules to make your system smarter:
- Auto-arm at 11 PM every night so you never forget to activate Away mode at bedtime
- Notify all household members when the system is disarmed by an unrecognized code
- Turn on smart lights when outdoor cameras detect motion after sunset
- Record a video clip on all cameras when any door sensor triggers in Away mode
Step 6: Test Everything
Do not skip this step. A security system you have not tested is a security system you cannot trust.
- Test each sensor. Arm the system in Away mode and open every door and window one at a time. Verify that the app sends a notification and the siren triggers for each one.
- Test motion sensors. Walk through each detection zone and confirm alerts appear. Have someone of smaller stature walk through as well to ensure sensitivity is adequate.
- Test cameras. View each camera’s live feed and review a recorded clip. Check that night vision activates properly after dark. Verify that smart detection correctly identifies people versus passing cars.
- Test the siren. Warn your household first. Trigger the alarm and confirm the siren is loud enough to hear from outside the house.
- Test remote access. Leave your home, connect to cellular data (turn off WiFi), and verify you can arm, disarm, view cameras, and receive notifications from the app.
- Test backup power. Unplug the hub and confirm it continues operating on battery backup. Most hubs provide 4-10 hours of backup power.
Common Mistakes to Avoid
1. Placing cameras too high. A camera at 20 feet captures the tops of heads, not faces. Mount outdoor cameras at 8-10 feet for the best balance of coverage and facial detail.
2. Ignoring WiFi dead zones. A camera with a weak WiFi signal will buffer, drop frames, or fail to send alerts. Test signal strength before you mount anything permanently.
3. Using default device names. “Camera 1” and “Sensor 2” are meaningless during an emergency alert at 3 AM. Use descriptive names like “Back Patio Camera” and “Garage Side Door.”
4. Forgetting to adjust sensitivity. Default motion sensitivity is often too high. If you are getting 50 alerts a day, you will start ignoring all of them — including the real ones. Tune sensitivity down until you get only meaningful alerts.
5. Skipping firmware updates. Security devices are targets for hackers. Manufacturers patch vulnerabilities through firmware updates. Enable automatic updates if available, or check monthly.
6. Not telling your household. Everyone in the home needs to know the arming PIN, how to disarm in an emergency, and what each mode does. Post a quick reference card near the keypad.
7. Neglecting battery maintenance. Set a calendar reminder to check battery levels monthly. Most apps show battery percentage for each device — take two minutes to glance at them.
What You Will Spend
A complete DIY smart home security system with local storage and no monthly fees can be built for $300-600 depending on how many cameras and sensors you need. Here is a rough breakdown:
| Component | Estimated Cost |
|---|---|
| Hub with local storage (e.g., Eufy HomeBase S380) | $100-150 |
| 2 outdoor cameras | $100-200 |
| 1 doorbell camera | $100-170 |
| 4 door/window sensors | $60-100 |
| 2 motion sensors | $40-60 |
| Total | $400-680 |
Compare that to a professionally installed system like ADT or Vivint, which charges $30-60 per month on a multi-year contract, and the DIY approach pays for itself within the first year.
Final Thoughts
Setting up a smart home security system is one of the most practical weekend projects you can tackle. The technology in 2026 is reliable, affordable, and genuinely easy to install without professional help. Start with the basics — hub, door sensors, and one or two cameras — and expand over time as you identify gaps in your coverage.
The key to a system that actually protects your home is not how much you spend. It is whether you take the time to plan your coverage, position your devices thoughtfully, and test everything before you rely on it. Consider adding a smart lock to your front door for a fully connected entry point that ties into your alarm automations.
Check Eufy S380 on Amazon